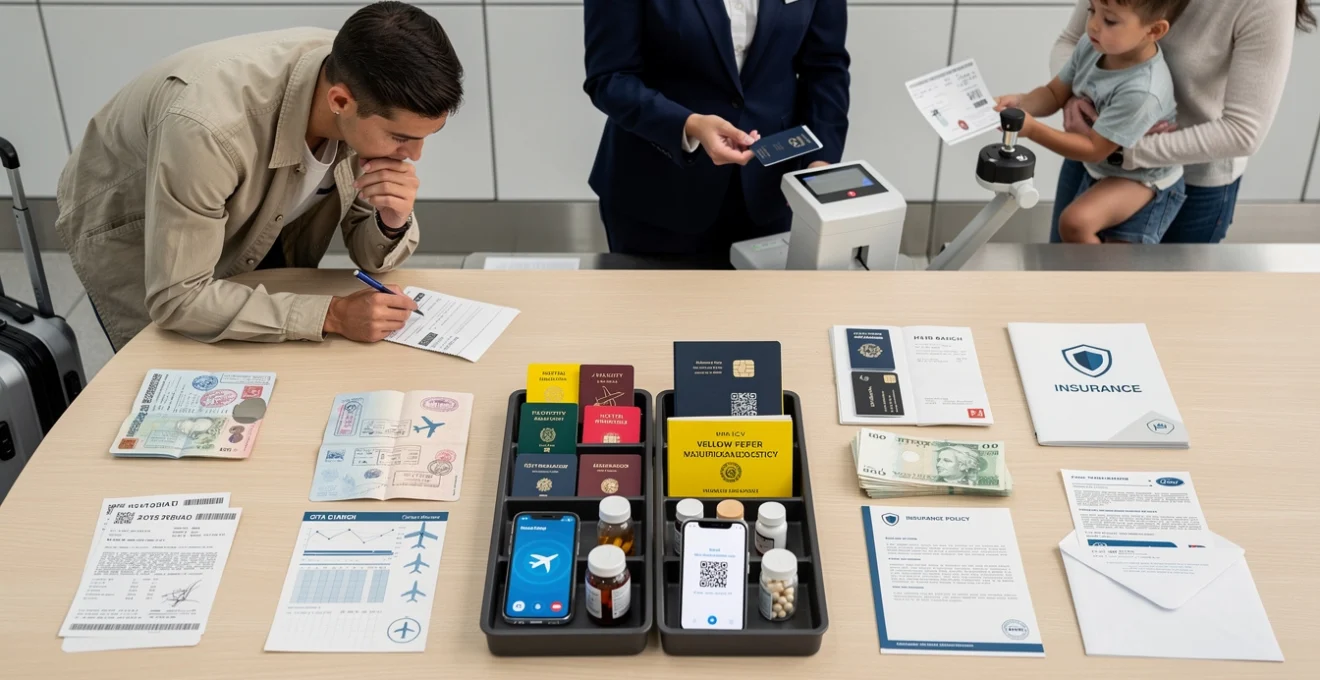
# Travel documents checklist you should never forget
International travel requires meticulous preparation, particularly when it comes to essential documentation. Every year, thousands of travellers face delays, denied boarding, or complications at immigration checkpoints because of missing, expired, or improperly prepared travel documents. The consequences can range from minor inconveniences to completely ruined holidays, with financial losses that can run into thousands of pounds. Whether you’re planning a weekend city break to Paris or an extended backpacking adventure across Southeast Asia, having the correct documentation isn’t just advisable—it’s absolutely essential for crossing international borders smoothly.
The landscape of travel documentation has evolved considerably over the past decade, with new biometric requirements, electronic authorisation systems, and enhanced security measures now standard across most destinations. What was once a relatively straightforward process of booking a flight and presenting a passport has transformed into a complex web of requirements that vary significantly depending on your destination, nationality, purpose of travel, and even the duration of your layovers. Understanding these requirements well in advance of your departure date can make the difference between a stress-free journey and a travel nightmare.
Passport validity requirements and biometric data standards for international travel
Your passport represents the single most critical document for international travel, serving as your primary identification and proof of citizenship abroad. However, simply possessing a valid passport isn’t always sufficient for entry into your destination country. Immigration authorities worldwide have implemented increasingly stringent requirements regarding passport validity periods, biometric data compliance, and document condition standards. Understanding these requirements prevents last-minute panic and potential travel disruption.
Six-month passport validity rule for schengen zone and asian destinations
Many countries enforce what’s commonly known as the six-month rule, requiring that your passport remains valid for at least six months beyond your intended departure date from their territory. This requirement applies to numerous popular destinations, including most of the Schengen Area countries in Europe, many Asian nations such as Thailand, Singapore, and Malaysia, as well as destinations across Africa and South America. The rationale behind this regulation centres on providing a buffer period should you need to extend your stay unexpectedly due to medical emergencies, natural disasters, or other unforeseen circumstances.
What catches many travellers off guard is that airlines often enforce these rules during check-in, even before you reach immigration control. If your passport doesn’t meet the destination country’s validity requirements, you’ll likely be denied boarding, regardless of whether your passport technically expires after your planned return date. For instance, if you’re travelling to Spain on 1st March and planning to return on 15th March, but your passport expires on 1st August, you might assume everything is fine. However, Spanish immigration requires six months of validity beyond your departure date, meaning your passport should be valid until at least 15th September. This seemingly minor detail has resulted in countless travellers being turned away at airports.
Additionally, some countries calculate the six-month validity from your date of entry rather than departure, whilst others apply different rules for different nationalities. Egypt, for example, requires only three months of validity for most Western passport holders, whilst Indonesia requires six months. Before finalising your travel plans, always verify the specific passport validity requirements for your destination through official government sources or your destination country’s embassy website. Renewing your passport well in advance—ideally when it has 12-18 months of validity remaining—eliminates this worry entirely.
Machine-readable passport (MRP) requirements and ICAO document 9303 compliance
Modern international travel relies heavily on machine-readable passports (MRPs) that comply with standards established by the International Civil Aviation Organization (ICAO) in Document 9303. These passports contain a machine-readable zone (MRZ) typically located at the bottom of the biographical data page, consisting of two lines of text with standardised formatting that allows automated systems to quickly extract key information such as your name, nationality, date of birth, and passport number. The MRZ uses optical character recognition (OCR) technology to process travellers more efficiently at border control checkpoints worldwide.
If you’re still carrying an older passport issued before 2006, you might possess a non-machine-readable version, which many countries no longer accept for entry. The United States, for instance, requires all travellers entering under the Visa Waiver Program to present machine-readable passports. Similarly, Australia, New Zealand,
and Japan all require MRPs that are fully compliant with ICAO Document 9303. If your passport cannot be read by automated systems, you may be pulled aside for manual processing, increasing the risk of delays, secondary questioning, or even denied boarding if airline staff believe your document does not meet destination requirements. In practical terms, most passports issued in the last decade already meet these machine-readable standards, but if your document is approaching 10 years old or has sustained significant wear and tear, it is wise to renew it before embarking on international travel. As a rule of thumb, if the MRZ at the bottom of your passport page is smudged, obscured, or partially torn, treat that passport as compromised and apply for a replacement.
ICAO Document 9303 does more than dictate how the MRZ looks; it also sets out technical specifications for font, character spacing, and data formatting that border control systems rely on worldwide. When your passport is swiped or scanned, the system cross-checks this data with watchlists, visa databases, and airline passenger manifests within seconds. This is why ensuring your personal details are correct and consistently spelled across all your travel documents—flight tickets, visas, and hotel bookings—is so important. Even minor discrepancies, such as an extra middle name or a missing hyphen, can trigger manual checks. Before travelling, double-check that your passport details exactly match the information on your reservations and visa applications.
Epassport chip technology and border control verification systems
Beyond machine-readable text, most modern passports now incorporate an embedded electronic chip, creating what is known as an ePassport. This chip securely stores your biographical information and a digital version of your facial image, and in some cases fingerprints or iris data, depending on your nationality and issuing authority. When you pass through automated e-gates at airports in Europe, North America, Asia, or the Middle East, the system reads this chip and compares it with live biometric data captured by cameras or scanners. This process significantly speeds up border checks while enhancing security against identity fraud.
For international travel, carrying an ePassport that complies with the latest ICAO biometric standards is increasingly becoming more than just an advantage—it is close to a requirement at many major hubs. Some countries prioritise or even restrict fast-track e-gate lanes to passengers with biometric passports, meaning those with older, non-electronic documents are forced into longer manual queues. In rare cases, carriers may refuse boarding for travellers holding outdated non‑ePassports when flying to destinations that mandate biometric verification on arrival. If the small rectangle with a circle symbol appears on the front cover of your passport, you hold an ePassport; if not, it is worth checking your destination’s entry rules and considering an early renewal.
What happens if the chip in your passport is damaged or unreadable? Border officers can usually still process you manually if the physical document is intact and genuine, but you might be subject to more detailed questioning or additional security checks. To minimise the risk of chip damage, avoid bending your passport, storing it in tight back pockets, or exposing it to moisture and extreme heat. Treat it like a sensitive electronic device rather than just another booklet. If immigration staff at home or abroad repeatedly report difficulty reading your chip, contact your issuing authority to discuss a replacement well before your next trip.
Emergency travel documents and temporary passport issuance procedures
Even with the best preparation, passports can be lost, stolen, or damaged beyond use while you are abroad. In such cases, many governments can issue emergency travel documents (ETDs) or temporary passports to help you return home or continue essential travel. These documents usually have limited validity—sometimes only a few days or months—and may restrict the number of countries you can transit through. You will often need to provide proof of your identity, passport details if available, passport photos, and evidence of imminent travel, such as a flight booking, before an embassy or consulate will issue an ETD.
The exact procedure varies by nationality, but broadly, you should report a lost or stolen passport to local police and obtain a police report as soon as possible. Then, contact your nearest embassy, high commission, or consulate and follow their instructions for an emergency replacement. Many missions offer online appointment systems and detailed checklists of the supporting documentation required. Be aware that some countries do not allow entry on emergency travel documents or have restrictions on transit, so you may need to adjust your route or obtain additional visas. Whenever you travel internationally, keep photocopies or digital scans of your passport and important pages—this simple step can dramatically speed up the issuance of an ETD.
After you return home, you will usually be expected to apply for a full standard passport to replace the emergency document. Travellers should also remember that some visas are issued directly into your passport; if that passport is lost, the visa may not be transferable. In such situations, you may have to reapply for visas or adjust your travel itinerary. To safeguard your trip, consider registering with your country’s foreign ministry travel service where available and keep an offline record of your embassy’s emergency contact details before you leave.
Visa documentation requirements across different immigration categories
Beyond your passport, visa documentation sits at the heart of any international travel checklist you should never forget. While some travellers benefit from visa‑free access or visas on arrival, many destinations require pre‑approved visas with detailed supporting evidence. The type of visa you apply for—tourist, business, transit, student, or work—determines what documentation you must submit, how long you can stay, and what activities you are legally permitted to undertake. Failing to provide the right visa or supporting paperwork can result in boarding denials, refused entry, or even removal on the next available flight at your own expense.
Understanding your visa category is therefore crucial before booking non‑refundable flights or accommodation. Are you entering purely for leisure, or will you attend business meetings, conduct training, or take part in paid work? Some countries draw sharp distinctions between these activities, and using the wrong visa type—even unintentionally—can be treated as a violation of immigration law. We will look at the most common visa documentation requirements for tourists, business travellers, and those in transit, as well as the increasingly widespread electronic travel authorisation systems you might need to navigate.
Tourist visa supporting documents: bank statements and proof of accommodation
For many destinations, obtaining a tourist visa involves more than simply filling out a form and paying a fee. Consulates often require evidence that you can financially support yourself, that you have a clear itinerary, and that you intend to leave the country at the end of your authorised stay. This is where key travel documents like bank statements, proof of accommodation, and return flight bookings come into play. Think of these as your way of reassuring immigration officers that you are a genuine visitor, not someone planning to overstay or work illegally.
Most embassies ask for recent bank statements—often for the last three to six months—to demonstrate stable income and sufficient funds. While the exact amount varies, some Schengen countries use guides such as €60–€120 per day of stay as a benchmark, though this can change and is not always published formally. Statements should be official, clearly show your name and account details, and preferably be stamped or certified by your bank. If someone else is funding your trip, you may also need a sponsorship letter, copies of their ID, and their bank documents. Always check the consulate’s website for the precise financial proof documentation they expect.
Proof of accommodation is equally important. This could be hotel bookings, rental confirmations, or an invitation letter from a friend or relative hosting you, often accompanied by a copy of their passport or residence permit. Immigration authorities use this information to verify that your plans are realistic and coherent: your hotel dates should align with your flight dates, and the cities you intend to visit should match the entries in your travel itinerary. When completing online visa applications, ensure that all details—addresses, booking numbers, and dates—are consistent with the supporting documents you upload.
Business visa invitation letters and company registration certificates
Business travellers face an additional layer of visa documentation requirements. Many countries insist on formal invitation letters from the host organisation, outlining the purpose of the visit, the duration of stay, and who will cover the costs. These letters should be printed on official company letterhead, signed by an authorised representative, and include contact details that the consulate can verify. A vague or incomplete invitation letter is one of the most common reasons for business visa delays, so it is worth investing time to ensure this document is precise and aligned with your own application form.
Embassies may also request copies of the host company’s registration certificates, trade licences, or tax identification documents to verify that the inviting organisation is legitimate. If your own employer is sending you abroad, you may need an employment verification letter confirming your role, salary, and the fact that you will return to your home country to resume your position after the trip. These documents serve as proof of your professional ties and financial stability, both of which reduce the perceived risk of overstaying. Before your appointment, cross‑check that job titles, dates, and company names are spelled consistently across all paperwork to avoid unnecessary questions.
In some jurisdictions, particularly for longer stays or repeated business visits, authorities may request additional documentation such as conference registrations, contracts, or training schedules. Ask yourself: if a visa officer spent two minutes reviewing my file, would they clearly understand who I am, why I am travelling, and how long I will stay? If the answer is anything short of an unequivocal yes, refine your documentation until it tells a clear, coherent story.
Transit visa requirements for layovers in dubai, singapore, and istanbul
Many travellers are surprised to discover that even short layovers can trigger transit visa requirements, particularly when changing airlines or terminals. Hubs such as Dubai, Singapore, and Istanbul handle millions of connecting passengers every year, and their rules differ depending on your nationality, the length of your layover, and whether you plan to leave the secure airside area. For example, some travellers can transit airside in Dubai without a visa for up to 24 hours, while others require a pre‑arranged transit visa or visa on arrival to clear immigration and explore the city.
Singapore’s Changi Airport offers a relatively straightforward transit experience for many nationalities, but specific passport holders still need a visa even if they are not leaving the airport, especially when switching between certain airlines or terminals. Istanbul’s airports also have varying rules based on whether you hold an onward ticket with a single carrier or separate bookings that require you to collect and re‑check luggage landside. Because conditions can change quickly due to security or public health concerns, you should always verify current transit regulations with both your airline and the official immigration website of the transit country before you travel.
As a practical step, map out your entire route and layovers when planning your trip abroad and ask: will I need to pass through immigration at any point before my final destination? If you are travelling on separate tickets or low‑cost carriers that do not interline baggage, you may effectively be entering the country during your layover, which can trigger full entry visa requirements rather than simple transit rules. Including transit visa checks in your travel documents checklist can prevent the nightmare scenario of being stranded in an airport because you are not permitted to board your connecting flight.
Electronic travel authorisation systems: ESTA, eTA canada, and ETA australia
In recent years, many governments have introduced electronic travel authorisation systems as an additional security layer for visa‑exempt travellers. If you are heading to the United States under the Visa Waiver Program, for instance, you must obtain an approved ESTA (Electronic System for Travel Authorization) before boarding. Similarly, Canada requires an eTA for visa‑exempt air travellers, and Australia runs its own ETA for short‑term visitors. These systems screen passengers in advance by cross‑checking your personal details against security databases, helping authorities identify potential risks before you arrive.
Although these authorisations are usually quick and straightforward to obtain, they are not automatic rights of entry. You typically apply online, pay a small fee, and receive a response within minutes to a few days. Once approved, an ESTA, eTA, or ETA is electronically linked to your passport and remains valid for multiple entries over a set period—often two to five years—provided your passport does not change. However, you should always print a copy of your approval or save a screenshot on your phone, as airlines may ask to see proof at check‑in if there is any issue retrieving the electronic record.
One common pitfall is leaving your application until the last minute. While most approvals are quick, some are flagged for manual review, which can take several days. Another frequent mistake is entering passport details incorrectly—mixing up letters and numbers, or using an old passport number—resulting in an authorisation that does not match your travel document. To avoid problems, apply at least a week or two before travel, double‑check every field, and remember that if you renew your passport, you will need to apply for a new electronic travel authorisation linked to the new document.
Medical documentation and international health regulations compliance
Health‑related travel documents have taken on renewed importance in recent years, from vaccination certificates to digital health passes. While requirements have relaxed in many regions since the height of the COVID‑19 pandemic, certain countries still enforce strict health entry conditions in line with the International Health Regulations (IHR) overseen by the World Health Organization (WHO). As with visas and passports, failing to carry the correct medical documentation can result in denied boarding or quarantine on arrival, so it deserves a place on any travel documents checklist you should never forget.
Health regulations vary widely by destination and can change in response to new outbreaks or public health concerns. Some countries focus on diseases such as yellow fever or polio, while others may require proof of COVID‑19 vaccination, negative tests, or specific health insurance coverage. Because airlines are usually responsible for checking that passengers meet destination health entry rules, it is crucial to consult official governmental and embassy resources well before you depart and again shortly before your flight, in case of last‑minute changes.
Yellow fever vaccination certificates for Sub‑Saharan africa and south america
The classic example of mandatory health documentation is the yellow fever vaccination certificate, often required for travel to or from parts of Sub‑Saharan Africa and South America. Countries such as Ghana, Rwanda, Brazil, and Colombia may demand proof of vaccination if you are arriving from, or have transited through, a yellow fever risk area, even if you only spent a few hours in an airport. The official certificate, commonly known as the yellow card, must be issued by an authorised vaccination centre and is generally valid for life once you have received a single approved dose.
Immigration officers typically check yellow fever certificates on arrival, and airlines may ask to see them at check‑in for flights to affected regions. If you cannot present a valid certificate where one is required, you may be refused boarding, quarantined on arrival, or required to receive vaccination at the border, sometimes at significant cost. For travellers with medical contraindications to vaccination, such as certain immune conditions or pregnancy, a medical waiver letter may be accepted by some countries, but this is not guaranteed. Always review your itinerary carefully to identify any transits through yellow fever regions and schedule your vaccination at least 10 days before travel to ensure your certificate is considered valid.
WHO international certificate of vaccination (ICV) and digital health passes
The WHO’s International Certificate of Vaccination or Prophylaxis (ICV) is the globally recognised document for recording certain vaccinations, including yellow fever. This yellow booklet can also be used by some countries to note other recommended vaccines, providing a convenient central record for frequent travellers. When you receive vaccinations at a travel clinic, ensure the details are clearly written, stamped, and signed by the authorised practitioner. Keep this booklet with your other core travel documents, ideally in a waterproof pouch, as damaged or illegible certificates may be rejected at border control.
In parallel, the past few years have seen a rapid rise in digital health passes and QR‑code based COVID‑19 certificates. While many destinations have scaled back strict digital verification, some regions and airlines still accept or prefer electronic proof of vaccination or test results from approved apps and platforms. Digital health passes can be convenient, but they are not foolproof—phone batteries die, apps crash, and QR codes sometimes fail to scan. For this reason, it is wise to carry printed copies of key health documents, such as vaccination records or negative test certificates, alongside any digital versions.
As public health policies continue to evolve, future travel may involve new or updated digital health tools. Whenever you plan a trip, check whether your destination country uses specific apps or portals for uploading health documents in advance, and follow the instructions carefully. Treat your health documentation with the same seriousness as your passport: keep backups, ensure names and dates match exactly, and store both paper and digital versions securely.
Prescription medication documentation and controlled substances declarations
Travelling with prescription medication is common, but doing so across borders introduces legal and regulatory considerations that many travellers overlook. Some drugs that are routine at home—including strong painkillers, ADHD medication, anti‑anxiety drugs, or even certain cold remedies—may be classified as controlled substances in other jurisdictions. Countries in the Middle East and Asia, for example, often apply strict rules, with potential penalties for possessing medication without appropriate documentation, even if it was legally prescribed in your home country.
To stay on the right side of the law, always carry your medications in their original packaging with clearly printed labels showing your name, the prescribing doctor, and dosage instructions. Accompany these with a copy of your prescription and, where possible, a doctor’s letter explaining the medical necessity of each drug, ideally in English or the local language of your destination. Some countries publish lists of restricted medicines and require travellers to obtain prior approval or submit a medication import form before arrival. Checking these requirements with the embassy or health ministry website well in advance can save you from serious complications at customs.
For travel insurance and emergency purposes, it is also sensible to have a summary of your medical history and a list of current medications available, either printed or stored securely online. If customs officers question your medication, being able to present organised, clearly labelled documentation can make the difference between a brief inspection and confiscation or legal issues. As with other travel documents, make copies and keep them separate from the originals, so that losing one bag does not leave you without evidence of your legitimate prescriptions.
Travel insurance certificates and coverage verification documents
Travel insurance may feel like an optional extra when you are booking a holiday, but from a documentation standpoint it is a crucial safety net. Many travellers do not realise that certain countries now require proof of medical or travel insurance as a condition of entry, especially for long‑stay or student visas. Even when it is not mandatory, carrying your travel insurance certificate and coverage details is essential if you need to access medical care, arrange emergency evacuation, or claim for lost luggage while abroad. It is no exaggeration to say that these documents can save you from crippling medical bills or financial hardship in an emergency.
Your core travel insurance documentation should include the policy certificate, summary of benefits, and emergency contact numbers, all clearly legible and accessible offline. Make a habit of printing a copy to keep with your passport and saving a digital version on your phone and in secure cloud storage. If you have additional coverage, such as separate medical evacuation insurance or specialised winter sports cover, keep those certificates together in a single folder. In the event of an accident or sudden illness, you may be asked to present proof of insurance at a hospital before treatment, particularly in countries where healthcare is largely private.
Before departure, take a few minutes to review what your policy actually covers and where the exclusions lie. Are adventure sports, rental cars, or high‑value electronics included? Is there a requirement to call the insurer before undergoing non‑emergency treatment? Understanding these conditions ahead of time will help you provide the right documentation to your insurer if you need to submit a claim. Consider this your final checklist: policy number memorised or saved, documents printed, digital copies backed up, and emergency contact information stored in your phone and shared with a trusted friend or family member.
Financial proof documentation and border control fund requirements
Another often overlooked category in any travel documents checklist you should never forget is proof of funds. Immigration officers in many countries are empowered to ask travellers to demonstrate that they have sufficient money to support themselves during their stay, particularly when entering visa‑free. This is not merely a formality: if you cannot satisfy these financial requirements, you may be refused entry and returned home at your own expense. While such checks are more common for younger backpackers or long‑stay visitors, any traveller can be asked to show evidence of funds.
Acceptable proof of funds typically includes recent bank statements, credit card statements, pay slips, or proof of prepaid accommodation and tours. For example, Schengen border officials may ask for evidence that you can cover a set minimum daily amount, combined with booked accommodation and a return or onward ticket. Some travellers also carry a letter from their employer confirming ongoing employment and salary, which can reassure border officers of their financial stability and intention to return home. If you are being sponsored by a friend or relative in the destination country, an official sponsorship declaration or affidavit of support, along with the sponsor’s financial documents, may be required.
Practically speaking, you do not need to hand over your entire financial history at every border, but it is wise to keep a small pack of printed statements and confirmation emails in your hand luggage, as well as digital copies on your phone. Check that your name and account details are clearly visible and that the documents are recent—usually no older than 30 to 90 days. Having this paperwork ready provides peace of mind and ensures that if you are selected for a spot check, you can quickly satisfy the officer’s questions and continue your journey without unnecessary delay.
Minor travel documents and parental consent authentication
When children travel internationally—whether with one parent, both parents, or another accompanying adult—the documentation requirements become more complex. Governments are increasingly vigilant about child abduction, trafficking, and custody disputes, meaning border officials may request additional evidence that the child has permission to travel. For families, this makes careful preparation of minor travel documents and parental consent forms an essential part of any international travel checklist you should never forget. Ignoring these rules can lead to distressing delays at the airport, missed flights, or in extreme cases, refusal to allow the child to leave or enter a country.
The exact documents you need depend on who is travelling with the child, their nationality, and the countries involved, but typically include passports, birth certificates, consent letters from non‑travelling parents, and in some cases court orders or custody agreements. Because these rules are designed to protect children, border officers will usually err on the side of caution if there is any doubt. Providing clear, correctly authenticated paperwork is the easiest way to show that everything is in order and avoid uncomfortable questioning at immigration.
Unaccompanied minor travel consent forms and notarisation requirements
For children travelling alone or with only one parent or guardian, many countries and airlines require a formal travel consent letter from the non‑accompanying parent(s). This letter should state the child’s full name and date of birth, the accompanying adult’s details (if any), the dates and destinations of travel, and explicit permission for the journey. To carry legal weight, these documents often need to be signed and witnessed by a notary, solicitor, or other authorised official. Some airlines even provide their own templates or unaccompanied minor forms, which must be completed as part of the booking process.
Notarisation helps border officials trust that the signature on the consent letter is genuine and that the parent understands and authorises the trip. Requirements vary: some countries accept a simple signed letter, while others insist on notarised documents or even legalised/apostilled consent forms. If a child travels frequently between two countries—for example, to visit a separated parent—having a standardised, professionally prepared consent letter ready can save time and reduce stress for everyone involved. Always check airline and immigration guidelines before departure, as they may specify the exact wording or additional identification that must accompany the consent.
Birth certificate apostille for hague convention member states
In certain situations, especially when a child’s surname differs from that of the accompanying adult, border officers may request additional proof of the relationship, such as a birth certificate. When this document is issued in one country but needs to be used in another—particularly between members of the Hague Apostille Convention—it may require an apostille. An apostille is a special certificate attached by a designated authority confirming that the public document (like a birth certificate) is genuine and recognised internationally among member states.
Obtaining an apostille usually involves submitting the original or a certified copy of the birth certificate to your country’s competent authority, paying a fee, and waiting for the stamped or attached apostille to be issued. Once complete, the document can be presented abroad without needing further legalisation by embassies or consulates. If you anticipate regular cross‑border travel with a child, or if you are dealing with complex family circumstances such as adoption or guardianship, arranging apostilled copies of key civil documents in advance can prevent last‑minute scrambling.
Remember that an apostille does not replace the need for translation where required. Some immigration authorities demand that foreign‑language birth certificates and apostilles be accompanied by certified translations into their official language. Factor the time and cost of these steps into your travel planning, especially for peak holiday seasons when processing times can increase.
Custody documents and sole parent travel authorisation letters
Where parents are separated, divorced, or where one parent holds sole custody, additional documentation may be required to demonstrate the legal right to travel internationally with a child. Court orders, custody agreements, and official guardianship papers are often requested at borders if an officer suspects a potential dispute or risk. Carrying certified copies of these documents, along with a clear consent letter where appropriate, can provide immediate reassurance that the trip is authorised and lawful.
If you are a sole parent or legal guardian, a letter explaining your status accompanied by supporting court documents can simplify interactions with immigration officials. In some cases, authorities may still request evidence that the other parent is aware of or agrees to the travel, especially if the custody order is not exclusive. Where there is a risk of conflict or dispute, seeking legal advice and carrying comprehensive documentation is essential. Treat these papers as vital travel documents on a par with passports and visas: keep them secure, carry backups where possible, and be prepared to present them calmly and confidently if asked.
By anticipating these documentation requirements for minors and preparing well‑organised, properly authenticated paperwork, you significantly reduce the chances of disruption to your journey. For families, the most valuable item on a travel documents checklist you should never forget is not just the child’s passport, but the entire bundle of supporting evidence that proves they are travelling safely, legally, and with the full consent of everyone who has a right to be involved.