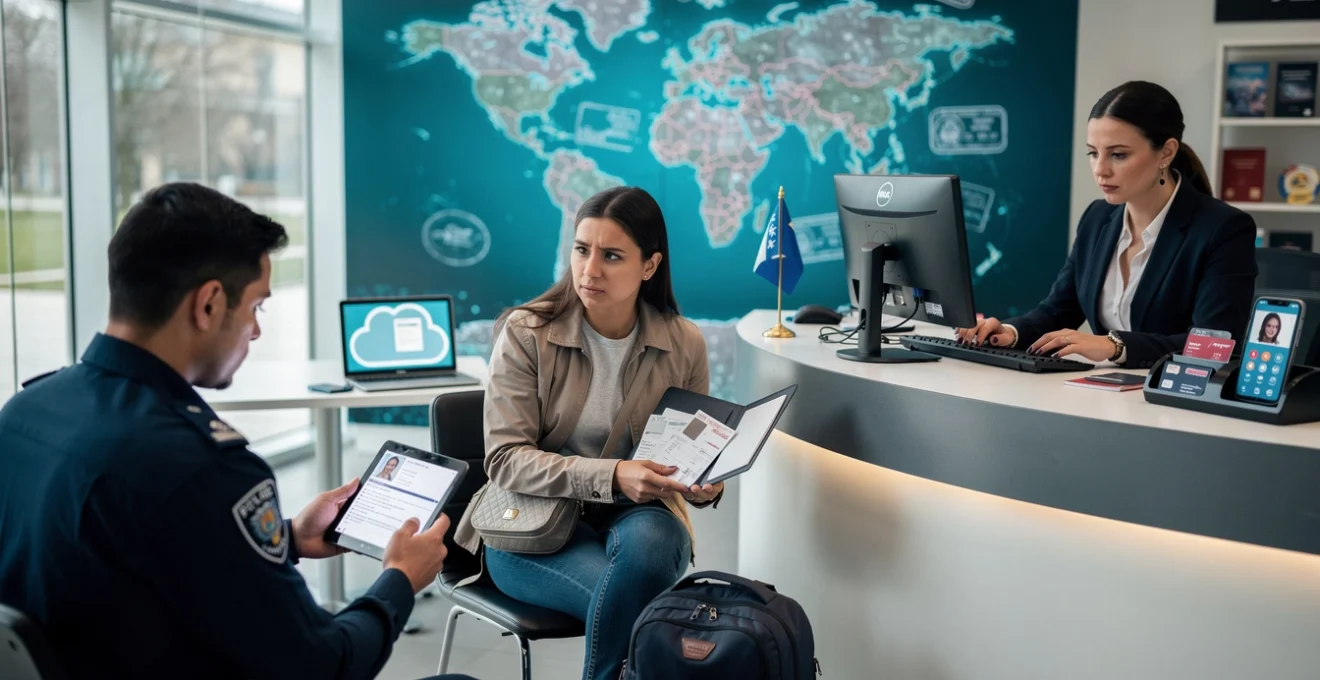
The sinking feeling that accompanies discovering your passport has vanished from your hotel room, or realising your wallet containing every form of identification has been lifted from your bag in a crowded market, ranks among the most distressing experiences any international traveller can face. Yet each year, thousands of British travellers find themselves in precisely this predicament, navigating foreign bureaucracies, language barriers, and urgent timelines whilst attempting to secure replacement documentation that will allow them to continue their journey or return home. The challenges multiply exponentially when you’re unfamiliar with local procedures, lack backup identification, and face imminent travel deadlines.
Understanding the proper protocols for document recovery can transform a potential travel catastrophe into a manageable inconvenience. Modern consular services, digital verification systems, and streamlined emergency procedures have significantly improved the replacement process, though the experience still demands patience, organisation, and methodical adherence to established protocols. Whether you’ve lost a passport in Paris, had your visa stolen in Vietnam, or discovered your bank cards missing in Buenos Aires, knowing the correct sequence of actions can expedite recovery and minimise disruption to your travel plans.
Immediate actions upon discovering missing travel documents
The moments immediately following the discovery that your travel documents are missing prove critical in determining how smoothly the recovery process unfolds. Your initial response should prioritise both personal safety and evidence preservation, as the steps you take within the first hour often significantly impact subsequent replacement procedures. Before panicking or making hasty decisions, you need to methodically assess your situation, secure your immediate safety, and begin documenting the circumstances surrounding the loss.
Securing personal safety and temporary identification evidence
Your first priority involves ensuring you’re in a safe location where you can think clearly and take stock of exactly what’s missing. Move to a secure environment—your hotel room, a police station, or your embassy—before attempting to catalogue missing items or contact authorities. Create an immediate inventory of what you still possess: do you have any secondary identification, such as a driving licence photocopy, student ID, or even a credit card with your name? These seemingly insignificant items can prove invaluable during the replacement process.
If you’ve been carrying digital copies of your documents in cloud storage or email, access these immediately. Photographs of your passport biographical page, visa stamps, and travel insurance documents can significantly accelerate replacement procedures. Many modern travellers maintain encrypted digital wallets containing scanned copies of essential documents; if you’ve taken this precaution, you’re already several steps ahead in the recovery process. Even screenshots of booking confirmations or accommodation receipts can help establish your identity and travel legitimacy.
Filing a police report: jurisdiction requirements and documentation protocols
Visiting the local police station to file an official report represents a non-negotiable requirement for virtually all document replacement processes. Most embassies and consulates will not process emergency travel document requests without a police report confirming the loss or theft. When filing your report, you’ll need to provide as much detail as possible: the approximate time and location of the loss, circumstances surrounding the incident, and comprehensive descriptions of missing items including document numbers if you remember them.
Request multiple certified copies of the police report, as you’ll need to submit this documentation to various authorities—your embassy, insurance company, and potentially immigration officials. In some jurisdictions, obtaining a police report can take several hours, particularly if you require translation services or if the station experiences high traffic. Don’t be surprised if the process feels bureaucratic; police in tourist-heavy areas frequently handle such cases and have established procedures, though these may not align with British expectations of efficiency.
The police report serves multiple critical functions beyond embassy requirements. It creates an official record that can protect you from identity fraud, provides documentation for insurance claims, and establishes a timeline of events that may prove relevant if your documents are later misused. Some countries issue a crime reference number or incident report number that you’ll reference in all subsequent communications with authorities.
Contacting your embassy or consulate: emergency consular services activation
Once you’ve secured a police report, your next call should be to the nearest British embassy or consulate. Most diplomatic missions maintain 24-hour emergency contact numbers specifically for British nationals facing crisis situations abroad. When you ring, you’ll speak with cons
ular staff trained to deal with lost passport and stolen document scenarios. Be prepared to provide your full name, date of birth, nationality, and, if you have them, your passport number and any Home Office or immigration reference numbers. The consular officer will explain the specific procedure for your location, including whether you must attend in person immediately or can first email scanned copies of your remaining identification and your police report.
For British travellers, emergency consular services typically include cancelling your lost passport, issuing an Emergency Travel Document (ETD) where appropriate, and advising you on local immigration rules if your visa has also been lost. They may also help you contact family members, liaise with airlines regarding your situation, and provide lists of English-speaking lawyers or translators if needed. Remember, however, that embassies cannot act as travel agents or banks, and they cannot bypass local law—consular support is powerful, but not unlimited.
When contacting your embassy or consulate, keep careful notes of who you spoke to, any case reference numbers provided, and the documents they request you bring to your appointment. Many diplomatic missions now require you to complete online forms or book appointments through digital platforms before attending in person, even in emergencies. Where possible, ask the consular staff to send you written confirmation of the steps to follow by email so you can refer to them and show them to other authorities, such as border guards or airline staff.
Notifying financial institutions and credit card issuers
If your wallet or bag containing bank cards has gone missing alongside your travel documents, you must treat financial security as an immediate parallel priority. Contact your bank and credit card providers as soon as possible using their international emergency numbers, which are usually printed on the back of the card and available on their websites. Explain that your cards were lost or stolen abroad and request an immediate block or cancellation to prevent fraudulent transactions.
Most major financial institutions operate 24/7 fraud lines and can issue replacement cards, arrange emergency cash advances, or coordinate with partner banks to provide temporary access to funds. You may be asked several security questions, so having prior knowledge of your last transactions, card limits, and account details can significantly speed up the process. Keep a written log of the time of your calls, the names of the representatives you speak to, and any reference numbers they provide, as this will be useful if you later need to dispute unauthorised charges.
Where you still possess at least one functioning card or access to online banking, consider immediately reducing your card limits and enabling additional security features such as transaction alerts or two-factor authentication. Think of this step as shutting windows as well as locking the door: blocking lost cards is essential, but reducing your digital exposure helps protect against further financial loss if thieves attempt to exploit saved card details or online accounts linked to your identity.
Documenting the loss: photographic evidence and witness statements
Beyond formal police reports, maintaining your own detailed record of events can greatly strengthen your position when dealing with embassies, insurers, and immigration authorities. Start by writing a brief timeline describing when you last saw your documents, where you believe they were lost or stolen, and what you were doing at the time. Include precise times, locations, and any unusual occurrences, such as crowded public transport, street disturbances, or interactions with strangers that may have been a distraction technique.
If applicable, take photographs of relevant locations—your hotel room door, a broken locker, a damaged bag, or a prised-open car boot—as these images can help demonstrate the circumstances of the loss. While such photographs may not always be formally required, they often prove persuasive when submitting travel insurance claims or explaining your situation to sceptical officials. Similarly, if any witnesses observed the incident or can confirm that you had your documents at a particular time, ask them for written statements including their contact details.
Treat this evidence collection as building a small case file that follows you through each stage of the recovery process. Store copies of your police report, embassy correspondence, and bank notifications together—either in a physical folder or in a secure cloud-based folder accessible from your phone. This organised approach not only reduces stress when repeatedly asked for the same information, it also demonstrates to authorities that you are a credible, well-prepared traveller whose account of lost travel documents can be trusted.
Emergency passport replacement through diplomatic missions
Once your immediate safety is secured and the loss has been formally reported, the central challenge becomes obtaining a document that will allow you to travel legally. For most British travellers, this means working with a diplomatic mission—an embassy, high commission, or consulate—to secure an Emergency Travel Document or, in some circumstances, a full replacement passport. The precise process varies by country and by the capacity of the local mission, but common principles and requirements apply worldwide.
Standard emergency travel document (ETD) issuance procedures
An Emergency Travel Document, sometimes called a temporary passport, is designed for situations where time is short and full passport issuance is impractical. ETDs typically allow you to travel back to the UK or to a limited number of specified destinations, such as your current location, transit countries, and your final destination. Unlike a standard passport, they are usually valid only for a single journey or for a very short period, often less than a year.
To apply for an ETD, you will usually need to complete an online application form, upload a recent passport-style photograph, and provide details of your travel plans, including flight bookings. You will also be required to attend the diplomatic mission in person to prove your identity, present your police report, and sign the document before it is issued. In many cases, appointments can be booked the same day, but during peak seasons or in locations with limited consular capacity, you may face waiting times of 24–48 hours.
Think of the ETD as a bridge rather than a permanent replacement: it gets you home or to your next secure destination, but you will still need to apply for a new full-validity passport once back in the UK. Airlines and border authorities worldwide are familiar with ETDs, but you should still carry printed copies of any email confirmations from the embassy and your original police report in case airline staff or immigration officers request additional reassurance at check-in or border control.
Required biometric data and supporting documentation for expedited processing
In today’s security-conscious environment, emergency passport and ETD applications almost always involve biometric verification. This generally means you will need to provide a recent digital photograph and, in some cases, fingerprints, much like you would during a standard passport application. Some diplomatic missions are equipped with biometric capture devices on-site, while others may rely on compatible local service providers; the consular staff will advise you of the procedure applicable in your location.
Alongside biometric data, you should gather as much supporting documentation as possible to prove your identity and nationality. This might include photocopies or digital images of your lost passport, your UK driving licence, a birth certificate, a BRP (Biometric Residence Permit) reference number if applicable, or even documents such as NHS cards and student IDs. The more corroborating evidence you can provide, the smoother your application is likely to proceed, particularly in cases where your original passport is completely unavailable and there is no existing record at that mission.
If you hold UK immigration status in addition to British or other nationality—for example, if you are a refugee or hold limited leave to remain—you may also be asked to provide your Home Office reference number or Unique Application Number. For those travelling on Home Office travel documents rather than standard British passports, the embassy or consulate may need to liaise directly with the Home Office before authorising a replacement. This can add time, so providing accurate reference details at the outset is crucial for expedited processing.
Processing timeframes: same-day vs 48-hour emergency passport services
How quickly can you realistically expect to receive an ETD or emergency passport? In many straightforward cases, British travellers in major cities can obtain an ETD on the same day, particularly if they contact the mission early in the morning and bring complete documentation. However, you should plan for a more conservative timeframe of 24–48 hours, especially in countries with limited consular resources, security concerns, or public holidays that slow administrative processes.
Several factors influence processing speed: the complexity of your case, the ease of verifying your identity, the availability of biometric equipment, and whether the mission must seek additional authorisation from London or another central authority. If you have imminent travel booked, share your flight details with consular staff at the outset; in some situations, they may be able to prioritise truly urgent departures, but there are never guarantees. Airlines increasingly require passenger information in advance, so you may also need to adjust your booking once your ETD issue date is confirmed.
It is wise to think of emergency passport services as something between an express courier and a specialised medical appointment: they can be fast when everything aligns, but they are still bound by rules, staffing levels, and external checks. Building in an extra day or two for contingencies can prevent a secondary crisis in which you possess your ETD but have missed your original onward flight due to unavoidable administrative delays.
Consular fees and payment methods at overseas missions
Emergency passport replacement is rarely free, and understanding consular fees in advance helps you avoid awkward surprises at the counter. British diplomatic missions typically charge a set fee for issuing an Emergency Travel Document, and additional fees may apply if you later decide to convert that document into a full passport through an overseas application. Fees are periodically updated, so consulates usually direct you to the official government website or email you an information sheet listing current charges in both pounds sterling and local currency.
Payment methods vary widely between missions: some accept only local currency in cash, while others permit debit or credit card payments, often subject to currency conversion charges. A small number may take bank drafts or postal orders, though this is increasingly rare in favour of electronic payments. Because your cards may have been lost alongside your passport, it is prudent to have at least one alternative means of payment, such as a separate emergency card kept in your luggage or access to an online banking app that allows you to transfer funds to a friend or relative who can assist.
Before attending your appointment, confirm with the embassy which payment methods are accepted and whether there are any additional costs, such as courier fees if your ETD or passport will be delivered rather than collected. Think of this like checking baggage rules before flying: a quick question in advance can save you from a stressful scramble at the counter when you are already fatigued and anxious about your lost travel documents.
Replacing stolen or lost visas and entry permits
While losing your passport is disruptive, losing your visa or entry permit can be just as problematic, especially in regions with strict immigration controls. Many countries now rely on electronic authorisations such as ESTA or eTA, which are linked to your passport number, while others still issue paper or sticker visas inserted directly into your passport. When these documents vanish with your passport, you must navigate two bureaucracies simultaneously: your home country’s consular services and the host nation’s immigration authorities.
Coordinating with immigration authorities: ESTA, eTA, and electronic visa reapplication
For countries that use electronic travel authorisation systems—such as the US ESTA or Canada’s eTA—replacing the lost authorisation is often a matter of reapplying once you have a new passport or ETD. Because these systems are tied to your passport number, a new document generally requires a fresh application and fee. You can usually complete this process online, but you should not assume automatic approval, particularly if your circumstances have changed or if the original authorisation was close to expiry.
In some jurisdictions, you may be able to travel using your Emergency Travel Document while your new ESTA or equivalent is processed, but you must confirm this directly with the relevant immigration authority or official website. Airlines are typically held responsible for transporting passengers with valid authorisation, so they may refuse boarding if there is any doubt about your current status. Treat immigration coordination like synchronising two clocks: your identity document and your electronic visa must both be valid and aligned for seamless travel.
For other forms of e-visas, such as those issued by many Asian and African countries, you may need to contact the issuing country’s immigration department or local embassy to request a reissue based on your original application. Having a printed or digital copy of your original approval email, reference number, and payment receipt is immensely helpful, as it allows officials to locate your file quickly and determine whether they can simply duplicate the authorisation onto your new passport.
Schengen visa replacement through member state consulates
Travellers who require a Schengen visa face a particular challenge when that visa is lost or stolen inside the Schengen Area. Because Schengen visas allow movement across multiple countries, the responsibility for replacement normally falls to the consulate of the member state that issued the original visa or the country that represents it. This means you may need to contact a consulate located in a different city—or even a different country—than the one you are currently visiting.
In practice, if you lose your Schengen visa alongside your passport, your first step is still to obtain an Emergency Travel Document from your own embassy or consulate. Once you have that, the relevant Schengen consulate can determine whether to issue a replacement visa, an exit visa limited to leaving the Schengen Area, or written confirmation that allows you to depart legally without a full reissue. Some member states may also request proof of continued accommodation, travel insurance, and financial means before granting a new visa, mirroring the original application requirements.
It is important not to overstay your authorised period while waiting for replacement documents. If your original Schengen visa was close to expiring at the time of loss, immigration authorities may be less inclined to grant an extended or multiple-entry replacement. Think of the Schengen rules as a train timetable: once your ticket’s time window closes, it becomes much harder to board, even if the reason for delay was beyond your immediate control.
Visa waiver programme violations and re-entry documentation
For British travellers using visa waiver arrangements—either under formal Visa Waiver Programmes or informal short-stay exemptions—the loss of documentation can inadvertently lead to status violations. If authorities cannot easily verify your original date of entry and permitted stay, you may appear to have overstayed or entered irregularly, particularly if your entry stamp was in the lost passport. To mitigate this risk, keep secondary evidence of your entry, such as boarding passes, email confirmations, or airport transport receipts.
If you need to leave and re-enter a country that previously admitted you under a visa waiver, you may be required to meet full visa requirements on re-entry, especially if you have spent significant time there already. Some countries treat a lost passport and reissue as a natural break in your stay; others will count your days across both old and new documents. Before making onward travel plans, check the official immigration website or seek advice from your embassy to clarify whether you will be allowed back under the same conditions.
Where a visa waiver violation is suspected, immigration officials may impose fines, require you to depart sooner than planned, or restrict future entry. Proactive communication is therefore vital. Present your police report, ETD, and any proof of your original lawful entry as soon as questions arise, rather than waiting for an officer to discover discrepancies during a routine check. Transparency, supported by documentation, often makes the difference between a sympathetic resolution and a formal breach recorded against your name.
Managing lost bank cards and financial access abroad
Even with your identity and immigration status under control, losing access to your money can grind your journey to a halt. While modern banking tools provide multiple ways to restore financial access, each option carries its own timelines and limitations. Your aim is to create a layered safety net so that the loss of one card or wallet does not leave you entirely stranded.
After blocking your lost or stolen cards, ask your bank whether they offer emergency cash services through global partners such as Western Union or major international banks. Many UK banks can authorise you to collect a limited amount of cash from a partner branch abroad once your identity has been confirmed by security questions or, in some cases, by embassy-issued documents. This facility is often capped and may incur charges, but it can keep you afloat while waiting for longer-term solutions.
Another practical step is to leverage trusted contacts at home. With secure messaging and online banking, a family member or friend can often book hotels or flights on your behalf, transfer funds via online platforms, or receive replacement cards on your home address and forward them by express courier. To minimise the risk of fraud, share only the minimum necessary information and use well-known, secure channels rather than ad hoc transfers to unfamiliar accounts.
For future trips, consider diversifying your financial tools before departure: carry at least two different bank cards on separate networks (for example, Visa and Mastercard), store one card in your day bag and another in your main luggage, and keep a modest reserve of local currency and a major foreign currency such as US dollars or euros in a hidden compartment. This approach is akin to maritime safety: a well-equipped ship does not rely on a single lifeboat, and neither should an international traveller rely on a single piece of plastic.
Digital document recovery: cloud storage and certified copy authentication
Digital backups can turn a chaotic document loss into a manageable administrative exercise. If you have scanned your passport, visas, insurance policies, and other key documents and stored them in secure cloud services, you possess a powerful toolkit for proving your identity and reconstructing lost paperwork. Accessing these files from a hotel computer, smartphone, or internet café allows you to provide consular staff, police, and insurers with accurate details rather than relying on memory alone.
However, not all officials will accept digital copies at face value, especially when dealing with high-risk documents such as passports or residence permits. In some cases, you may be asked to obtain certified copies or notarised printouts that attest to the authenticity of the digital images you provide. Local notaries, lawyers, or even the embassy itself may be able to certify that the printed document is a true representation of the original image, lending it greater evidential weight in administrative processes.
The ideal workflow combines convenience with security. Store your digital documents in an encrypted folder within a reputable cloud platform, protect your accounts with strong, unique passwords and multi-factor authentication, and avoid downloading sensitive files onto public or shared computers where they might be left behind. Think of your cloud storage as a fireproof safe: invaluable in an emergency, but only if the keys are protected and access is limited to you and, optionally, a single trusted person at home.
Country-specific protocols for document loss recovery
Although the principles of handling lost documents while visiting another country are broadly similar worldwide, local protocols can differ significantly. Some nations operate highly centralised systems with online portals for reporting lost passports and requesting replacements, while others still rely heavily on in-person visits, paper forms, and manual record checks. Being alert to these differences—and respecting them—can make your recovery process considerably smoother.
For example, in some European countries, tourists must first report document loss to a dedicated tourist police unit rather than a general station, whereas in parts of Asia or South America, it may be necessary to report the loss both to local police and a regional immigration office. Similarly, certain countries require exit permits or specific stamps if you are leaving on an Emergency Travel Document, and failing to obtain these in advance can lead to delays or fines at the airport. Always verify country-specific requirements through official government websites or advice from your embassy rather than relying solely on anecdotal reports from other travellers.
Statistics from international travel insurers suggest that document loss incidents are concentrated in a relatively small number of destinations with high tourist volumes, such as major European capitals and popular beach resorts. This means that local authorities in these areas are often familiar with the necessary procedures, even if the process feels laborious from a British perspective. Approaching officials with patience, clear documentation, and a willingness to follow local steps—no matter how unfamiliar—will usually yield better results than insisting on how matters would be handled in the UK.
Ultimately, handling lost documents abroad is about combining universal best practices with local knowledge. By understanding both the general framework—police report, embassy support, immigration coordination, financial security, and digital backups—and the specific expectations of the country you are visiting, you equip yourself to turn a potentially trip-ending crisis into a temporary logistical challenge that you can overcome with composure and careful planning.